ImajeJ is an image processing and analysis tool written in Java, there are downloadable distributions available for Windows, Mac OS and Linux. You can download the user guide from here. ImageJ is free and open source software, it has more than 500 available plug-ins.
ImageJ saves its configuration data in the same folder where the software is installed, on Windows OS, this corresponds to the folder "C:\Program Files\ImageJ\". However, this is not allowed starting from the Vista version of Windows and ahead. So you have to run this application with "administrative privileges": right click the program shortcut and choose "Run as administrator".
Instead of running ImageJ, every time in the way described above, you can make an application shortcut for ImageJ where in its Compatibility tab has the option "Run this program as administrator" is enabled.
Pixel Coordinates
In both, ImageJ and Iris the position of the image pixels is given with (x, y) coordinates, where x is measure in the horizontal dimension and y in the vertical one. However, in ImageJ the image origin is (0,0) on the top left corner, whilst in Iris is (1,1) on the bottom left one. For this reason, to convert coordinates from one system to the other, supposing the picture has W x H pixels (horizontal by vertical dimensions) you should use:
ImageJ.y + Iris.y = H
Iris.x = ImageJ.x + 1
Image Brightness and Contrast
You can use the menu option "Image > Adjust > Brightness Contrast" to get the "B&C" (Brightness and Contrast) control, which helps you to get a better image display without changing the image pixel color values. This tool affects the displayed image in a similar way as the Threshold control does it in Iris.
When you open a monochromatic image, the screen output is automatically —and unavoidably— adjusted in a way that the minimum pixel value in the image is displayed as black, and the maximum pixel value is displayed as white. For example, if the image pixel values are in the source range of [20% to 80%] of brightness, they are mapped to the display range of [0% to 100%], and the values between the source range are linearly interpolated into the display range.
That's the reason why you can open a monochromatic image file in ImageJ and see it with different brightness than when seeing the same image with another software.

This is the ImageJ 'B&C' control. Notice how the input minimum and maximum brightness levels (within red frames) are restricted to the image pixel color values and mapped to 0% to 100% brightness.
Saving an Image With .FITS Format
To save an image into a file, you should use the menu command "File > Save as > FITS...". Here you have information about the .fits file format. This way, the file is saved with the .fits name extension. However, Iris uses .fit as the name extension for this same file format. So, to be able to open this file in Iris you have to override the default ".fits" extension in the "Save as" dialog window and use ".fit" instead.
colorMatrix
colorMatrix is an ImageJ script that helps you to transform an image from one RGB color space to another one. This transformation is made through the use of a color matrix given by you. You use this link to get more information about colorMatrix.
Analyzing Image Samples
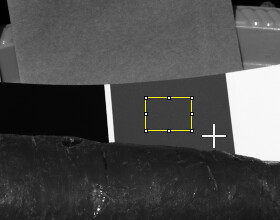
ImageJ allows you to get some statistical information about rectangular samples of an image. You have to drag the mouse around the area you are interested in, and choose the command " Analyse » Measure" or press Ctrl+M.
The measurement results window will give you the area (number of pixels in the sample), the Standard Deviation, the mode, minimum value, maximum value, median, etc.
You can also choose the command "Results » Set Measurements..." and add other useful measurements to the result. The following image shows you the available options
Find the image areas you will clip
Sometimes you need to clip highlight or shadow areas in order to avoid color shifting problems as those described in The Strange Case of Pinkish Highlights. In such cases, we will probably want to know which areas will be affected by the the clipping.
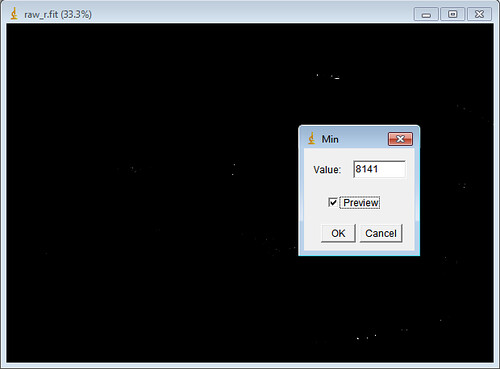
ImageJ provides a simple way to find that. You can use the menu options "Process » Math » Min..." and "Max..." to keep in the image the pixel values with a given minimum or maximum value.
For example, we have a channel were we want to keep only pixel values below 8141 ADU. That sounds something radical considering (in this example) these raw ADU values are in the [0, 16383] domain. To find out what we will loose with that clipping, we show the pixels with values equal or above to 8141 with the "Min..." command. We don't even have to trigger the command, because the Preview options let us see those pixels.

The ImageJ "Min..." command shows on a black background the pixels that will be clipped if we keep the pixel values below or equal to 8141 ADU.
Clipping Highlight or Shadows
With the commands "Process » Math » Min..." and "Max..." we can respectively clip the shadows or the highlights. For example, with the "Min..." we will keep the pixels with values above or equal a given value, so the given value will be the minimum in the resulting image.
Useful keyboard shortcuts
You can zoom in and zoom out the image by using the keys Ctrl + and Ctrl -.


